
Recently, I have taken the dive into python scripting in QGIS. QGIS is a really nice open source (and free!) alternative to ESRI's ArcGIS. While QGIS is a little quirky and generally not quite as user friendly as ArcGIS, it still provides nearly the same functionality. Personally, I've become a fan of it and now have even taught a short, 1 credit course in the University of Virginia's Batten School of Public Policy titled: GIS for Public Policy.
QGIS also provides a python API, called PyQGIS, which is the equivalent to ArcPy for ArcGIS. In the fall 2018 semester I met a staff member from UVA Health's Oncology department who wanted to visualize patient data. After removing identifying information, this person wanted to represent UVA Oncology patients by zip code from around the country. First, we wrote a long workflow for the staff person to do this via the QGIS GUI interface which worked, but was a long and tedious process, especially for her as an inexperienced GIS user. A python script to automate this process would clearly make her life easier and provided a convenient excuse for me to dive into PyQGIS.
A couple broad strokes thoughts I have about PyQGIS (and QGIS more generally) are: The level of support clearly showed here between ArcGIS and QGIS. ArcGIS has exhaustively documented every tool online complete with GUI examples and usable python scripts available to copy. QGIS, as an open-source software, clearly doesn't have the same resources backing it and documentation is not as comprehensive. Meaning, even for pretty commonplace operations like I was doing in this project, there were no readily available examples. Or at least I didn't find them. Complicating this, is the fact that in spring 2018 QGIS upgraded to version 3.x. Many examples I did find on various blogs, documentation, StackOverflow, etc were for older versions of the software and did not always translate. Note to self: Contribute to QGIS documentation in the future! Despite these hiccups, I figured things out and want to detail a couple steps in a way I wish I had found them when I was looking online.
This article is specifically about how to use the field calculator in a programmatic way using Python/PyQGIS for QGIS version 3.x.
A really common task in GIS workflow is to make new fields (columns) in a layer's attribute table and then populate that field based on the values from other fields in the attribute table. You can write all sorts of expressions using a handy tool called the Field Calculator. You can download the data I'll be using for this example here: https://github.com/epurpur/PyQGIS-Scripts/blob/master/TestZipCodes.zip This layer is a handful of zip codes in and around Virginia.
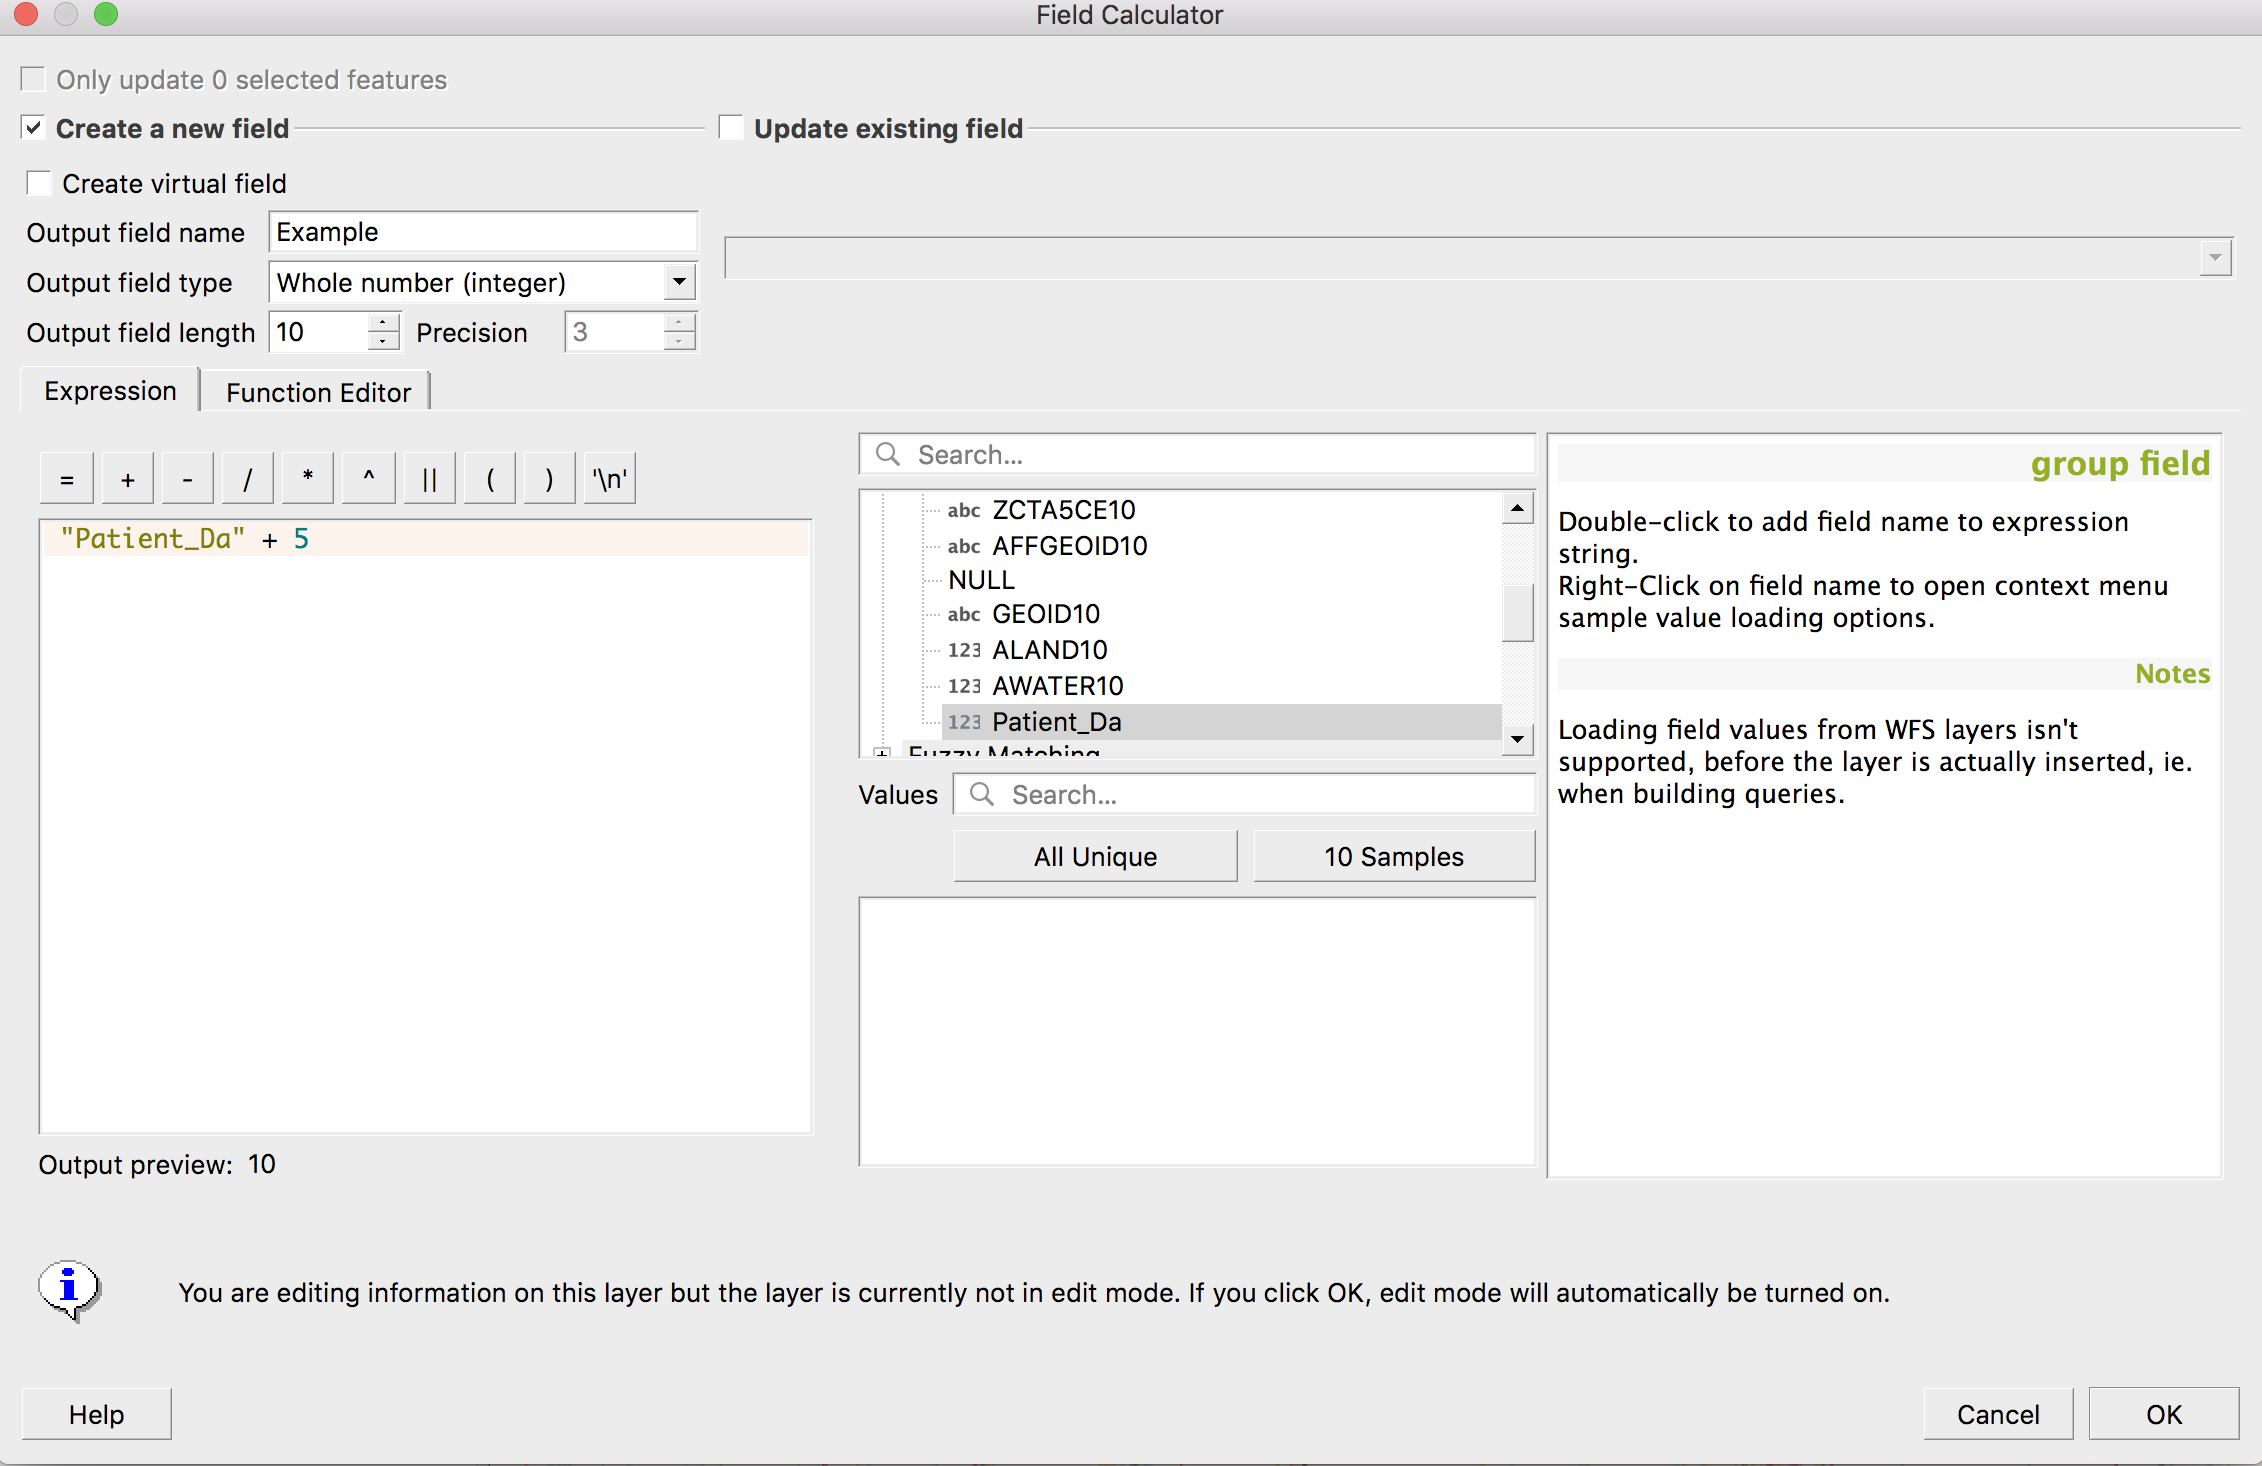
The GUI version of the field calculator looks like this:
However, I wanted to do this programmatically using python. The full code looks like this:
uri = '/Users/ep9k/Desktop/TestZipCodes/TestZipCodes.shp'
join_layer = iface.addVectorLayer(uri, 'Patients by Zip Code', 'ogr') #adds layer to map
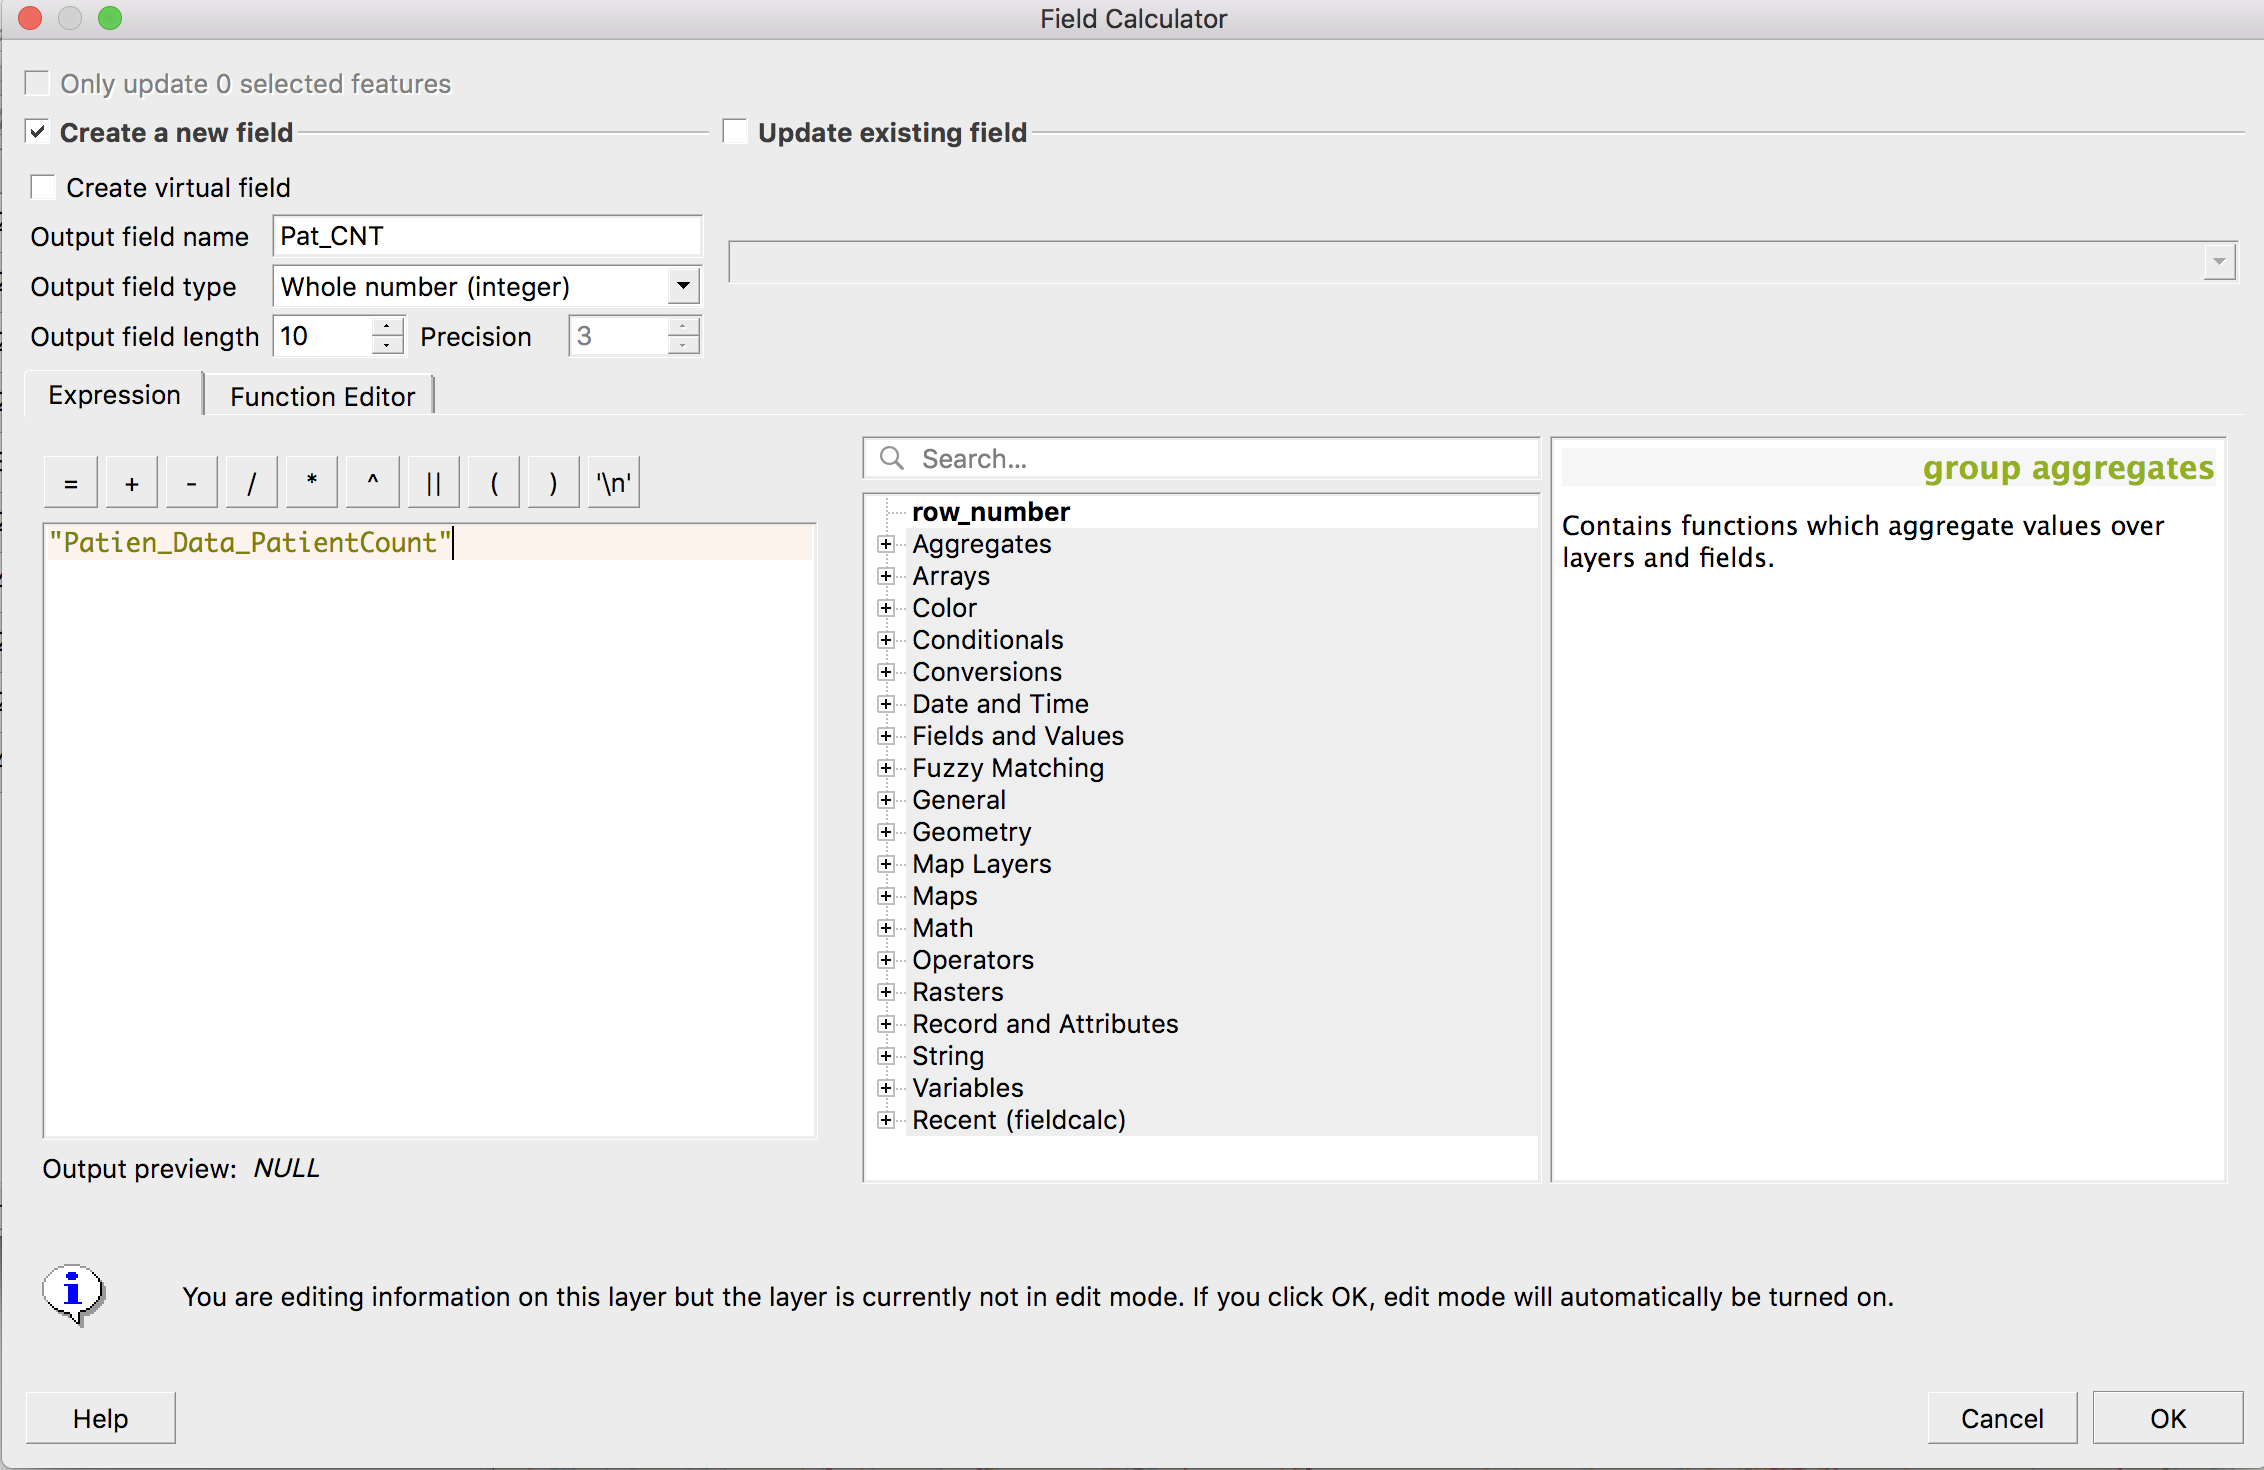
target_field = 'PatCNT'
def calculate_attributes():
"""Calculates values for 'PatCNT' by copying attributes from Patient_Da column
and adds them to 'PatCNT' column in US Zip Codes table"""
with edit(join_layer):
for feature in join_layer.getFeatures():
feature.setAttribute(feature.fieldNameIndex('PatCNT'), feature['Patient_Da'])
join_layer.updateFeature(feature)
print(f"Attribute calculated for {target_field} field")
calculate_attributes()
You can copy and paste this script directly into your QGIS python console and it should work, provided you change the uri to the actual path name of the shapefile on your own computer. Let's break this down. I actually do not need to import any libraries for this script, so the first thing I do is set up the pathname to my layer and add that to the map. Then I specify my target_field which is a blank column in the attribute table of the TestZipCodes layer. The column is titled 'PatCNT' which is short for Patient Count. These three lines take care of this:
uri = '/Users/ep9k/Desktop/TestZipCodes/TestZipCodes.shp'
join_layer = iface.addVectorLayer(uri, 'Patients by Zip Code', 'ogr')	#adds layer to map
target_field = 'PatCNT'
As I stated, make sure you change the uri variable to reflect the actual path to the layer on your own computer. Next, I created a function called calculate_attributes() with no arguments. As you can see in the docstring for this function, it calculates attributes for the 'PatCNT' field based on the values from the 'Patient_Da' column. Let's take the next few lines:
with edit(join_layer):
        for feature in join_layer.getFeatures():
First, I open a with block to edit the join_layer. A with block is good to use here because you don't need to explicitly close it. As soon as the block ends, editing ends. I start a for loop to iterate through each feature in the join_layer. The join_layer has about 10 zip codes in it. Now, the following line is the meat of this function:
feature.setAttribute(feature.fieldNameIndex('PatCNT'), feature['Patient_Da'])
This line is basically the equivalent of the GUI field calculator. Because we are in a for loop, for each feature I will setAttribute(), and this function takes 2 arguments. The first argument assigns the field we are writing to, which is the currently blank column 'PatCNT'. The second argument is the expression as you would write it in the field calculator. In this case, I am just replicating values from the 'Patient_Da' field. But I will give more examples shortly. If you were to write this expression in the field calculator, it would look like this:
So this expression is pretty boring currently, but the second argument of setAttribute() can be much more interesting. For example, if you want to add 10 to the values of 'Patient_Da' in the new 'PatCNT' field, your expression would look like this:
feature.setAttribute(feature.fieldNameIndex('PatCNT'), feature['Patient_Da'] + 10 )
As you can see, you can use math and other fields to calculate the value in 'PatCNT' just as you would in the GUI field calculator. If I wanted to calculate this field using some other attributes, it would look something like this:
feature.setAttribute(feature.fieldNameIndex('PatCNT'),
					 feature['Patient_Da'] * feature['AWATER10'])
This is a nonsense example but it serves to show how to use another feature in the attribute table. Here, I multiplied 'Patient_Da' by 'AWATER10'. 'AWATER10' is another attribute which stores the amount of water area in each zip code. Lastly, note that you ust include the 'Feature' part of that expression. This is because you are iterating over each feature in the attribute table.
And there you have it. This is how to write a Field Calculator expression using python in QGIS 3.x. I wrote this because as I stated earlier, I really couldn't find an easy to use resource to do so and hopefully this will serve as a guide to get started.
Erich Purpur
Research Librarian for Sciences & Engineering
University of Virginia Library
December 07, 2018
For questions or clarifications regarding this article, contact statlab@virginia.edu.
View the entire collection of UVA Library StatLab articles, or learn how to cite.